
Further study of the triangulation technique of drawing a face | Part 1 – female faces
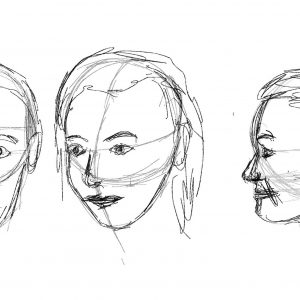
In the previous post (shown below) that described an alternative way to draw a face, the post has generated much interest from the readers. This could be the reason for many artists who try to perfect the art of creating portraits and area always looking for new techniques to help with drawing and painting portraits. In this post, I continue to expand the technique I introduced in my last post called the triangulation method of drawing faces and portraits.
In my previous article I discuss about the Andrew Loomis method of drawing heads. I found that using this technique is good for drawing the 3D animation heads but not as accurate for drawing portraits. In portraits the faces tend not follow a regular pattern that can be reused. This allowed me to develop a technique that one could use repeatedly to get a very good likeness of the portrait that you are drawing.
You can download the Loomis book in pdf from here.
Introduction
Anyone who has tried to draw or paint a face will know that the accuracy and positioning of the features of the face can make or break the drawing. In the worst case the face will look nothing like the original face with eyes, lips, nose out of proportion.
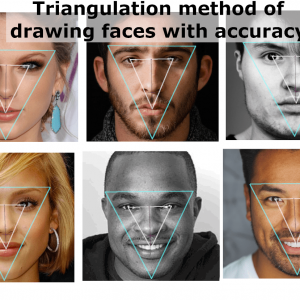
In an attempt to get more accuracy of the features of the face, I have developed a new technique which I call the triangulation method for drawing faces and portraits.
In the previous article that generated much interest, I take several random faces and try to do a best fit of the common features through the placement of triangles. I found that there is a common pattern of triangles that match the close proximity of the face and their positions can be described through two triangles. Please go through the article that I have provided above, it will be helpful to follow this post.
In this article, I will further breakdown the triangulation form to get an idea of how good a fit this model really is. I have decided to break down the post into a set of series of posts in order not to be too exhaustive. Also, I have decided that separating the female and male faces may provide further insights into the triangulation models true capabilities.
The process of developing the triangulation model
I originally came up with the idea of using sets of triangles to draw the face since I was a bit frustrated with getting the important features of the face onto my drawing. I would often find that my eyes were placed too high up or the nose was too low down. This is a result of how we visualize the subject we are drawing and some of us can often misinterpret the distances between prominent features. In the same way that our brain tends to make objects in a darker background lighter, this could be a similar effect to our spatial understanding. With the added gradients of shades that are often found on a face, we can often find spatial distances can be further complicated by the contrasting tonal values. This can be another form of study which I will leave to other artists to investigate.
When we examine a face we are faced with a triangular face with the eyes, nose and lips forming a nice triangle. However, we need take into account the eyebrows, the tip of the nose and the chin which are also essential to drawing an accurate face. Based on this argument, I have come across two triangles that encompass those features in a manner that is easy to locate and position for the drawing.
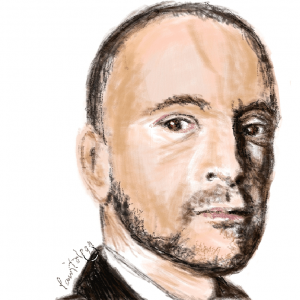
In the Loomis method of drawing a face and head, it can work effectively for drawing the head in various angles, however it does not allow for an accurate drawing of the face. For example, when we want to draw or paint a portrait of a person from a picture or from a live model. I have explored this method of drawing using the Paintology drawing app which you can find below.
Here is the previous link to the article:
You will also find various other videos that have been put on the Paintology YouTube that demonstrates the methods of triangulation drawing.
I am going to go further in my study of the triangulation method of drawing faces and portraits by continuing from my last post.
Further studies of the Triangulation technique of drawing a face/portrait
1. Extracting the common triangles to do some model fitting
I did not realize the huge interest that the triangulation technique had generated since I first put up the post. The Quora post on this topic that I had put up also generated a lot of views and even shares. I decided it was time to expand on this method and came up with some more ideas, which fortunately I did. However, like all models one needs to check in its validity for supporting a technique that will work in most situations. In this case, I thought about finding the common triangles that will be a good fit for most faces.
The way I did this, was to find a common set of concentric triangles that will be able to be used by artists that will fit most faces that they will draw or paint. From this point of view, I took the original set of triangles that was extracted from random faces and came up with a common triangle using the Gimp tool. What was surprising was the close fit of a ‘common’ set of triangles that could work for any face.
Here is the mapped out triangles that I overlapped to see how far they deviated from each other.

2. Use the Gimp tool to work out the model dimensions
I took the average dimension of the common triangle that was going to be used for the standard model. Here are the dimensions I extracted from the above diagram.
Here is the common triangle shapes and distances that I obtained.
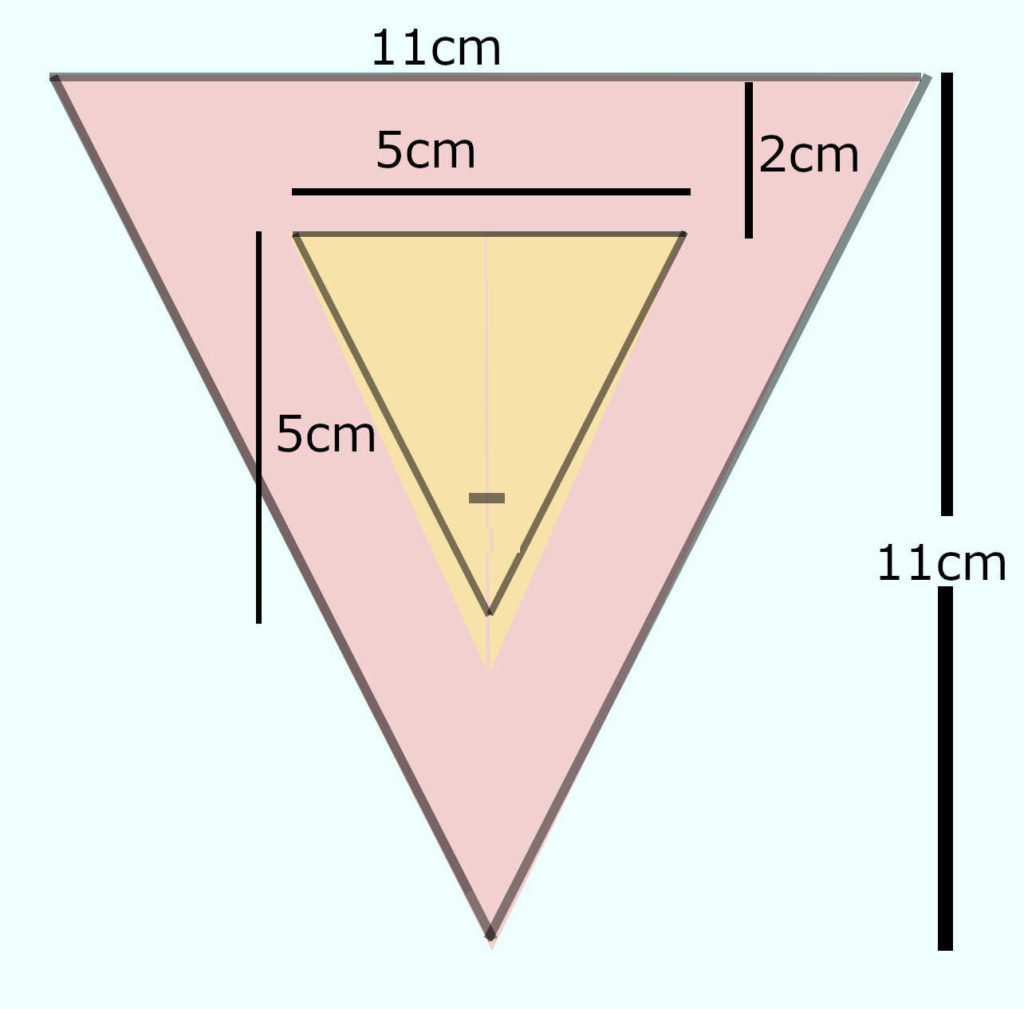
I was somewhat surprised that the inner triangle was 2x smaller than the larger triangle, ie. 11cm and 5.5cm. Maybe the symmetry of beauty that we have always envisioned in a face is down to mathematics!
In order to fit this model to a random set of faces, I created a png file from the above template so I can place over various faces. I used the two apex of the triangles to match the center points of the eyes in order to get a good fitting.
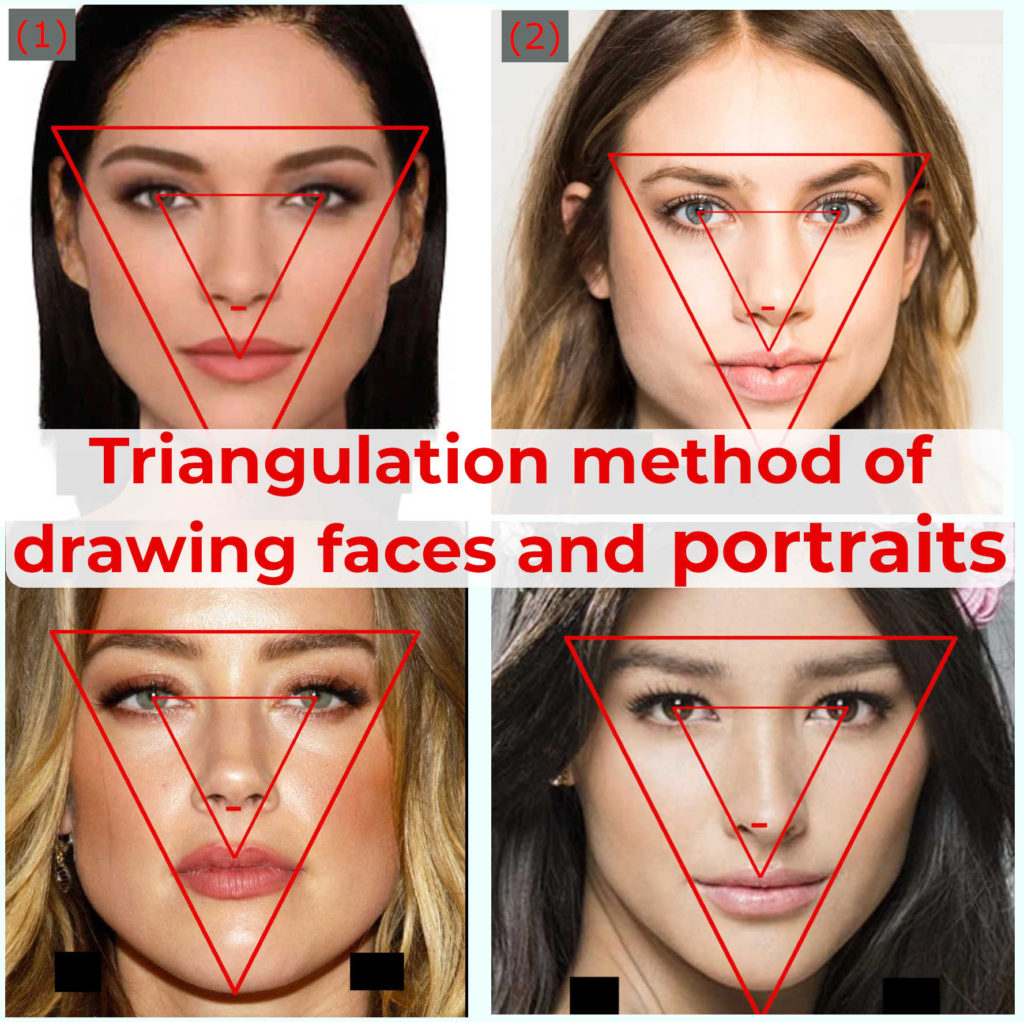
Here are the four female faces where I did the fitting.
Here are the four faces with the overlaid dimensions of the triangles that I produced earlier. You can decide how they compare but I have some thoughts which I explain below.
3. Some observations of the triangulation fit
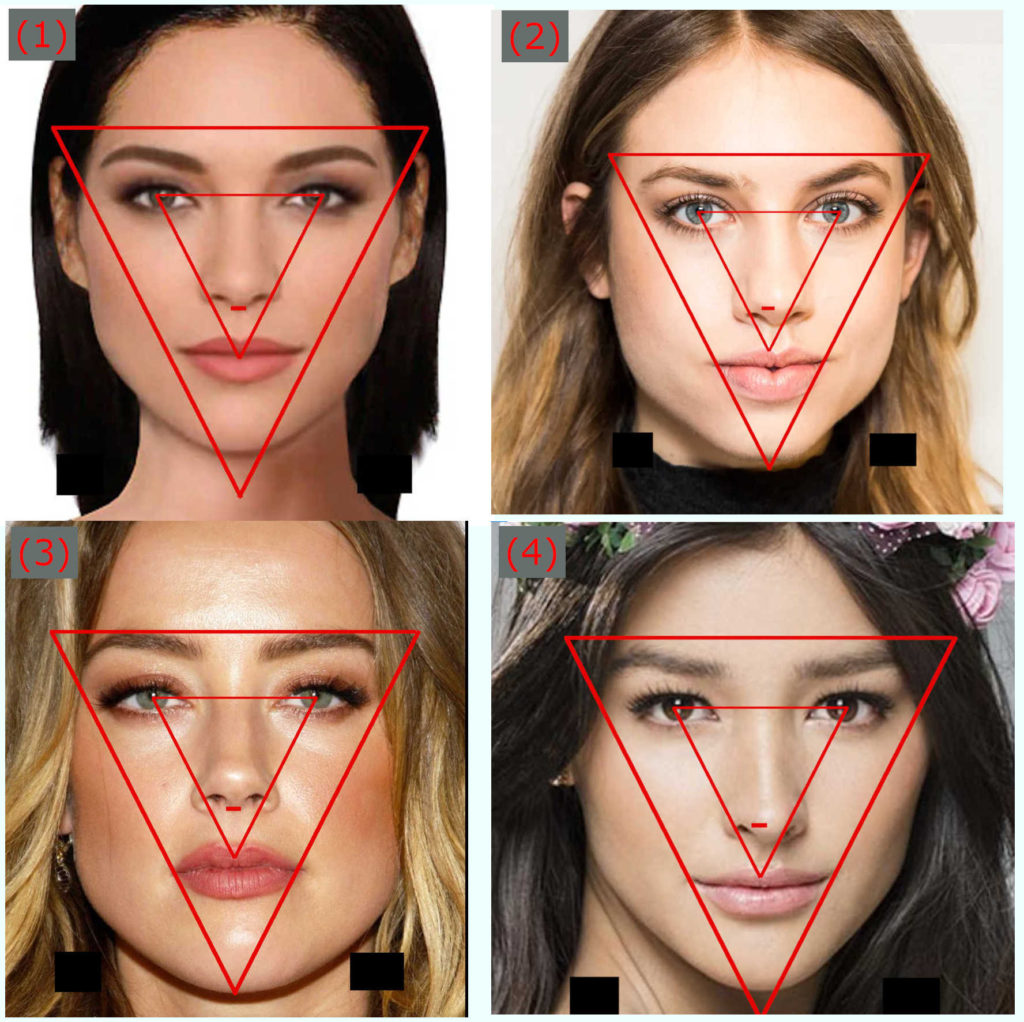
If you compare the four faces with the triangulation model fit, we can observe several differences that is worthy of further discussion.
The model is not a perfect fit for all the faces and more tweaks can probably be done to the ‘optimized’ triangular sets. You will see that (1), (2) and (4) have the top plane of the larger triangle fit closely except for (4) where the the line practically touches the eyebrows. It could be argued that Amber Heard (4) has her face tilted upwards compared to the other models and therefore pushed the eyebrows upwards.
The other points worth observing are the sides of the triangle encapsulates the whole lips. You will note that this is a great fit and will important to artists to get the full lengths of the lips correct with respect to the face. Below is an image showing the lips grouped together to show the close fit.
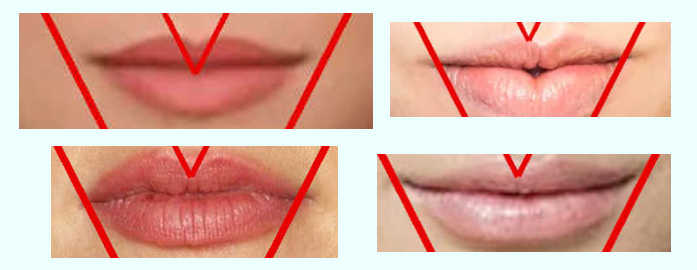
The technique appears to be an excellent fit for getting the proportions of lips correctly positioned on the face.
Let’s observe the nose elements to see how the model fits.

With respect to the nose, the triangulation technique will help to keep nose elements in close proximity since all the nose elements ie. nostrils are extending just outside of the triangular lines.
With respect to the other markers such as the chin we do see some deviation from the faces but I believe with some more optimization, we can also correct for this.
In the next post, I will do the same steps to triangulating the male faces. Watch this space!


 Digital Canvas
Leave a Reply