Finger painting with sponge on the Samsung Galaxy Tab 2
2 Sep 2012|
2342
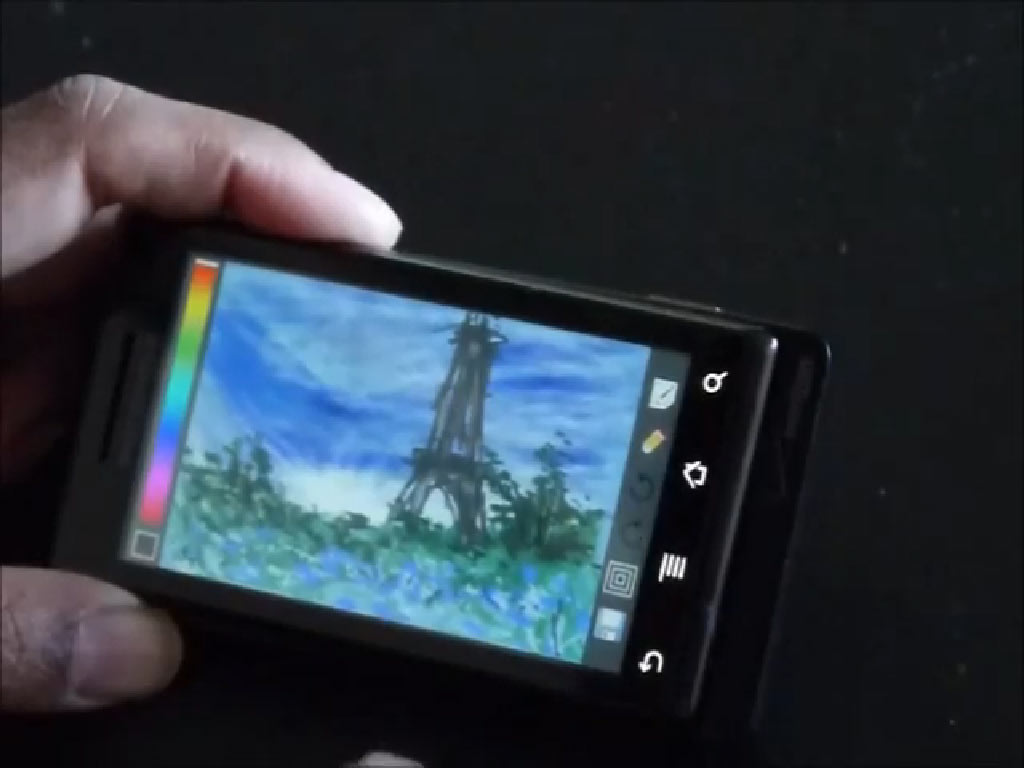
 Fig-1[/caption]
The topic of capacitive styluses got me so intrigued that I started hunting down information on the theory of touch screen displays and putting on my old engineering hat. I won’t bore with you what I discovered here and I will leave it for another separate post. However, what I learnt was that every day items could be used as styluses such as the common kitchen sponge and even anti-static bags.
[caption id="attachment_2263" align="alignright" width="310"]
Fig-1[/caption]
The topic of capacitive styluses got me so intrigued that I started hunting down information on the theory of touch screen displays and putting on my old engineering hat. I won’t bore with you what I discovered here and I will leave it for another separate post. However, what I learnt was that every day items could be used as styluses such as the common kitchen sponge and even anti-static bags.
[caption id="attachment_2263" align="alignright" width="310"] Fig-5[/caption]
In this painting I decided to use the humble sponge (fig. 5) and the use of my fingers. The painting that I ended up doing is shown in fig. 1.
[caption id="attachment_2264" align="alignright" width="310"]
Fig-5[/caption]
In this painting I decided to use the humble sponge (fig. 5) and the use of my fingers. The painting that I ended up doing is shown in fig. 1.
[caption id="attachment_2264" align="alignright" width="310"] Fig-2[/caption]
I initially picked up a blue canvas and then used the sponge to lay down the broader strokes for the sky and the green patch below. Hold the sponge so that you can use the corner to mark on the tablet. Surprisingly, I was able to select all the tools to change colors and brush using the tip of the sponge. I used the ‘haze light’ brush tool to sketch out the sky as shown in fig. 2. and for the green foreground I dabbed the sponge rather than using sweeping strokes as I did for the sky. Alternate the colors with different shades of blue and green to get the effect that you are looking for.
[caption id="attachment_2265" align="alignright" width="310"]
Fig-2[/caption]
I initially picked up a blue canvas and then used the sponge to lay down the broader strokes for the sky and the green patch below. Hold the sponge so that you can use the corner to mark on the tablet. Surprisingly, I was able to select all the tools to change colors and brush using the tip of the sponge. I used the ‘haze light’ brush tool to sketch out the sky as shown in fig. 2. and for the green foreground I dabbed the sponge rather than using sweeping strokes as I did for the sky. Alternate the colors with different shades of blue and green to get the effect that you are looking for.
[caption id="attachment_2265" align="alignright" width="310"] Fig-3[/caption]
I wanted to pay more attention to the light patch that is near to the horizon and deliberately increased the white there. Don’t worry about how it comes out at this stage just create the areas for now.
[caption id="attachment_2266" align="alignright" width="310"]
Fig-3[/caption]
I wanted to pay more attention to the light patch that is near to the horizon and deliberately increased the white there. Don’t worry about how it comes out at this stage just create the areas for now.
[caption id="attachment_2266" align="alignright" width="310"] Fig-4[/caption]
In figs. 3 and 4 I have further defined the painting by switching to the ‘shade’ brush tool and going over other parts of the painting using my finger. In particular, I was able to get a ‘wooly’ effect for the sky. I add more foreground information to give it some interest and finally etch in the tower as shown. For the tower, I switched to the ‘line’ tool to draw the outline by using two points of my fingers to draw straight lines. I then used the darker colors with the shade tool to further define the tower to give the final painting shown in fig 1.
These kind of paintings are generally very quick to do and I did learn something from doing this painting. As I had never used a sponge before or this new tablet, I wasn’t sure how the painting was going to turn out. I noticed there was a slight fear of uncertainty that came upon me and I could feel a lack of confidence creeping up on me. However, I have mentioned in some of my other posts that the most fundamental lesson that anyone can take away with them is to overcome their fears and move with confidence knowing that you will make mistakes along the way. And here I was falling into the same trap that I was preaching! Knowing this, I was able to pull myself together and just let my fingers do the talking...hope you will do the same.
Happy painting!
Fig-4[/caption]
In figs. 3 and 4 I have further defined the painting by switching to the ‘shade’ brush tool and going over other parts of the painting using my finger. In particular, I was able to get a ‘wooly’ effect for the sky. I add more foreground information to give it some interest and finally etch in the tower as shown. For the tower, I switched to the ‘line’ tool to draw the outline by using two points of my fingers to draw straight lines. I then used the darker colors with the shade tool to further define the tower to give the final painting shown in fig 1.
These kind of paintings are generally very quick to do and I did learn something from doing this painting. As I had never used a sponge before or this new tablet, I wasn’t sure how the painting was going to turn out. I noticed there was a slight fear of uncertainty that came upon me and I could feel a lack of confidence creeping up on me. However, I have mentioned in some of my other posts that the most fundamental lesson that anyone can take away with them is to overcome their fears and move with confidence knowing that you will make mistakes along the way. And here I was falling into the same trap that I was preaching! Knowing this, I was able to pull myself together and just let my fingers do the talking...hope you will do the same.
Happy painting!